Rules & Clarifications

The Complete Rules of Foretold

Every rule, revised for clarity and reorganized so you can find an answer mid-game — plus a full glossary and the official card index. Search for any term, card, or mechanic below.

Quick Overview Raiding & Combat Glossary Card Index

Showing rules for the base game.

Playing with the first expansion? Click above, or see what's new with Fatesworn →

Start Here

Quick Overview

Players2–4
Age Range12+
Play Time2p: 30–60 min · 3p: ~1.5 hrs · 4p: 2–2.5 hrs

Premise: Each player is competing to become a deity of legend in this strategic free-for-all. You'll align with one of four mystical Fates, build a glorious Temple, gather Faithful followers, and collect powerful Relics — all from a central Marketplace. Your Faithful battle through opposing Temples in a Raiding Party, and if they reach the Heart of a Temple, a channel opens to Smite your opponent, damaging their life force and bringing you one step closer to immortality.

How to Win: Reduce every opponent from 20 Life Points to zero, or collect all four Fate Relics of the same type (Chaos, Grace, Prosperity, or Wisdom) to win at the start of your next turn.

Playing with Fatesworn? +Fatesworn There's a third path to victory: hold all four Relics of the Fates at the start of your turn.

Components

  • Dice: 10 six-sided Combat Dice, 4 twenty-sided Life Point Dice, 1 oversized six-sided Smiting Die (special faces: 3, 4, 4, 5, 5, 6)
  • Cards: 80 Faithful Cards, 40 Relic Cards, 120 Fate Cards (four decks of 30)
  • Tiles: 45 double-sided Tiles — 20 Starting Tiles, 25 in the Tile Deck — on 8 punch-out sheets
  • Additional punch-outs: Gold Coins, Shield Markers, Raiding Character Markers
  • 4 Raiding Party Marker bases
  • One 14"×24" Marketplace game board

A full card-by-card breakdown of every Faithful, Relic, Tile, and Fate Card — with exact quantities — is in the Card Index at the end of this page.

Setup

Give each player:

  • 5 Starting Temple Tiles, all on their A-sides, arranged in a T-formation with the Heart at the base: 1 Entrance, 1 Pathway, 1 Treasury, 1 Sanctum, 1 Heart (with its Life Counter set to 20).
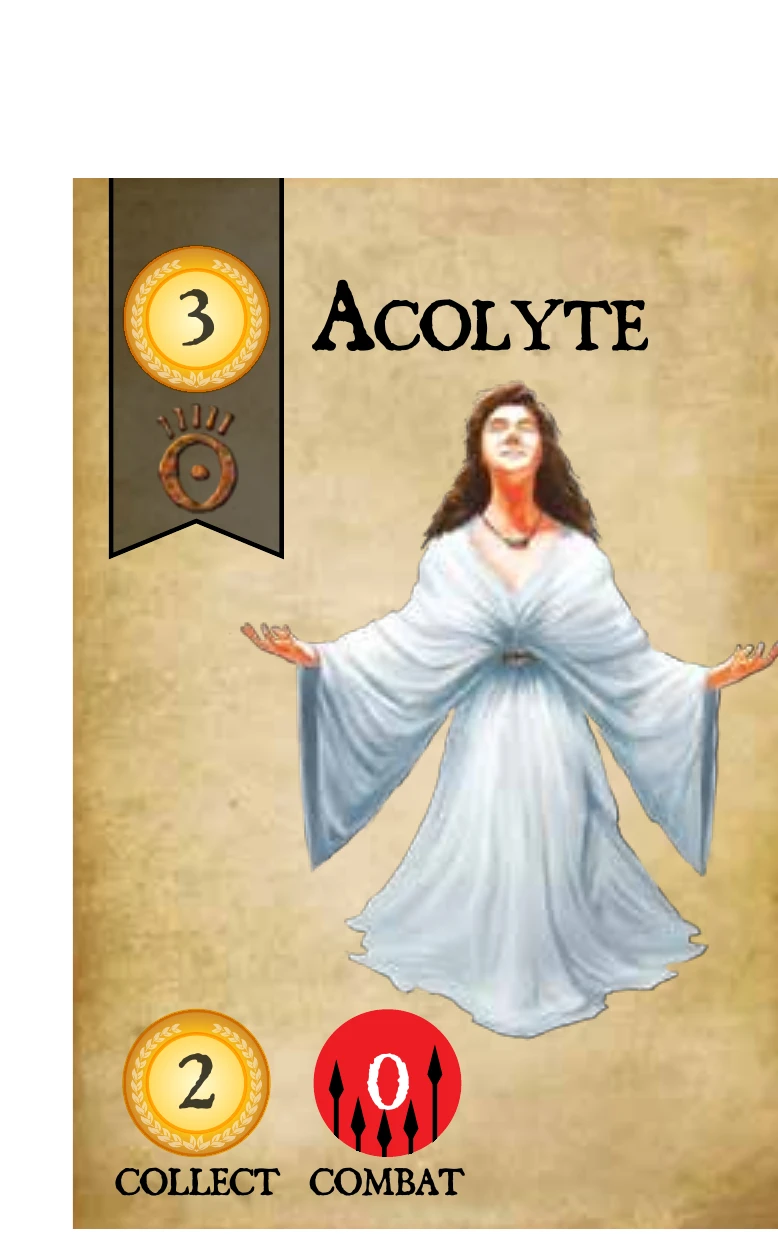
  • 4 Starting Faithful Cards: 1 High Priest, 1 Acolyte, 2 Guards — all placed in their Temple to start.
  • 1 Raiding Party Marker.
  • 20 Life Points (the maximum). Track this with a 20-sided die on or near your Heart Tile.

Then, to prepare the shared Marketplace:

  1. Place 2 Guard Faithful and 2 Acolyte Faithful in the Faithful Row of the Marketplace.
  2. Shuffle the Relic Deck and set it beside the (empty) Relic Row.
  3. Shuffle each of the four Fate Decks (Chaos, Grace, Prosperity, Wisdom) and place them on their marked spots.
  4. Shuffle the Tile Deck and place it blank-side-up in the Marketplace.
  5. Roll dice to determine turn order — play proceeds clockwise from the winner.
Fatesworn Setup +Fatesworn

Choose your Heart Tile pool. Fatesworn adds 6 unique alternate Heart Tiles, each with its own face-up ability, to use in place of the original Heart. Agree on one pool before dealing out starting Temples:

  • 6 New Tiles — use only the 6 Fatesworn Heart Tiles.
  • 7 Tiles — all 6 new Heart Tiles plus 1 original Heart Tile.
  • Skip it — everyone just keeps their original Heart Tile.

Assigning the Tiles (if using the 6- or 7-tile pool): either shuffle the pool and deal one Heart Tile to each player at random (recommended for new players), or draft them: place the whole pool A-side up and pass all of it to the player going last in turn order. That player secretly chooses one Tile, then passes the rest to the player on their right (counter-clockwise). That player chooses one and passes the remainder on, and so on, until the player going first has taken their Tile. Any Tiles nobody took are set aside face-down — every chosen Heart Tile's B-side stays secret until it's revealed in play.

Once assigned, place your Heart Tile A-side up in your Temple as normal, with its Life Counter set to 20.

Turn Structure at a Glance

Every turn has four steps, always in this order:

StepWhat Happens
I. RevealRestock the Marketplace with one new Faithful and one new Relic.
II. MarketplacePlay Faithful for gold, buy cards and Tiles, rearrange your Temple — in any order, any number of times.
III. Raid (optional)Send your Raiding Party against one opponent's Temple.
IV. ReinforceCollect all your Faithful and reassign them to Temple or Raiding Party for next turn.

I. Reveal

  • Place 1 Relic from the Relic Deck into an empty spot in the Relic Row. If no spot is empty, cover any Relic of your choice, forming a pile — only the top card of a pile can be bought.
  • Place 1 Faithful from the Faithful Deck into an empty spot in the Faithful Row, following the same cover rule if the row is full.

II. Marketplace

You may take any of the following actions, in any order, as many times as you like:

  • Play Faithful from your Temple to immediately collect gold. Played Faithful go to a temporary Discard Pile until your Reinforce Step. Spend the gold you collect to buy from the Marketplace, flip Tiles, or bank it in your Treasury for later.
  • Buy Faithful, Relics, or Tiles from the Marketplace. Only the top card of any pile, and the top Tile of the Tile Deck, can be bought.
    • Purchased Faithful go to your Discard Pile.
    • Purchased Relics are placed face-up beside your Temple (Fate Relics have restrictions — see Relics).
    • Purchased Tiles cost a flat 3 gold and are placed in your Temple as long as their doorways line up (see Tiles & Your Temple).
  • Rearrange your Temple. Rotate, turn, and shift your Tiles freely, as long as every Tile still connects via at least one doorway and every Tile has a doorway path back to the Entrance.

III. Raid (optional)

Choose one opponent and send your Raiding Party to attack their Temple, fighting your way toward their Heart Tile. Full mechanics are in Raiding & Combat.

IV. Reinforce

Collect every Faithful you have — whether they're in your Discard Pile, your Temple, or came back from a Raid — and split them into two face-down groups for next turn:

  • Temple: limited to 1 Faithful per Station icon across your Tiles.
  • Raiding Party: no limit.

Faithful in your Temple can collect gold and Defend, but cannot Raid. Faithful in your Raiding Party can only Raid — they can't collect gold or Defend. Set your Raiding Party Marker on top of your face-down Raiding Party to keep the two groups straight.

The Marketplace

The Marketplace is the shared board where Tiles, Faithful, Relics, and Fate Cards are all acquired. Its Faithful and Relic rows are restocked one card at a time during each player's Reveal Step. When a row is full, the current player covers any card in that row to make room — but only the top card of any resulting pile (and the top Tile of the Tile Deck) is ever available to buy.

Tiles & Your Temple

Tiles are the building blocks of your Temple. Each player starts with the same five Starting Tiles and can buy more from the shared Tile Deck. Tiles bought from the deck are blank two-doorway hallways on their A-side — you won't know what's on the B-side (a Room, a Trap, or just a well-connected hallway) until you pay to flip it.

Tile Icons

Flip Cost icon Flip Cost
How much gold it costs to flip this Tile from its A-side to its B-side. On Starting Tiles the cost is printed on the A-side; on Tile Deck Tiles it's hidden on the B-side until you buy and flip it.
Combat Bonus icon Combat Bonus
Adds to the Defending player's Combat Roll during a Raid — but only while the Tile is being actively Defended. If every Defending Faithful on that Tile is removed from combat, the bonus disappears and the Tile is conquered.
Station icon Station
A defensible position. Each Station lets you house one Faithful in your Temple, so more Stations mean a bigger Temple hand and better defense.
Altar icon Altar
Lets you house one Fate Relic face-up in your Temple. An Altar with no Relic on it is simply "empty."

The Starting Tiles

  • Sanctum — your first Altar. Its B-side adds a Station.
  • Entrance — the front door of your Temple; every Raid begins here. Its wide north-facing doorway can never be blocked by another Tile. Its B-side adds a Combat Bonus when Defending.
  • Treasury — where unspent gold is stored, in any amount. Its B-side adds an Altar.
  • Pathway — blank on its A-side. Its B-side adds a Station, a Combat Bonus, and two more doorways.
  • Heart — where your Life Points live (tracked with a 20-sided die). Has 2 Stations, plus a Combat Bonus on its B-side. If an opponent conquers this Tile during a Raid, they get to Smite you.

The Tile Deck

The 25-card Tile Deck contains 8 Trap Tiles, 6 unique Room Tiles (each with just 1 doorway but a special ability), and 11 connecting Tiles with 2–3 doorways. More than half of the deck has Stations; only 8 Tiles have Altars. Some Tiles let you search the Relic Deck for a specific Relic when flipped — you're never required to find one.

Placement & Restrictions

  • Your Temple can never exceed a 4×4 grid. Tiles align orthogonally only — two Tiles must share a full edge (their doorways lined up against each other) to connect. Tiles that only touch at a corner are not connected, and there must always be an unbroken doorway path from your Entrance to every other Tile in your Temple.
  • You can't buy a Tile if there's no legal, connected spot to place it.
  • Once bought, a Tile stays in your Temple permanently unless a card specifically says to remove it.
  • Once flipped to its B-side, a Tile stays that way unless a card specifically says to flip it back.
  • You may flip a Tile any time you can pay its Flip Cost — except if flipping it would require rearranging your Temple to keep doorways aligned. In that case, you must wait for your Marketplace Step.

Trap Tiles

The Tile Deck holds 4 different Trap Tiles. Traps stay on their A-side and spring automatically — for a one-time effect — the moment a Raiding Party Marker lands on them; flipping is not optional once triggered. A Trap has no further effect on later Raids, with one exception: the Ambush Trap has a Station icon and can go on to be used as a Defensive position. A Raiding Party can't retreat in response to a Trap springing, but its controller can still play Fate Cards or other actions in response.

Faithful

Faithful are your followers — the cards that populate your two hands: your Temple and your Raiding Party. They're reusable turn after turn unless something sacrifices them (sacrificed Faithful go to the bottom of the Faithful Deck). Every player starts with the same four: 2 Guards, 1 Acolyte, and 1 High Priest, all beginning in the Temple and ready to collect gold on turn one.

The High Priest Playing him is your primary way to draw Fate Cards (per his own printed card text — playing him for gold also draws you a Fate Card). Other Relics and Fate Cards can grant additional draws (the Offering Relic, for example). His divine protection also means he can never be sacrificed or taken by an opponent.

Playing Faithful

"Playing" a Faithful means placing it face-up from your active hand (Temple or Raiding Party) to trigger its effect, after which it's temporarily discarded. You'll play Faithful in several situations:

  • From your Temple, during the Marketplace Step, to collect gold.
  • From your Temple, during a Raid, to Defend.
  • From your Raiding Party ("dispatching" them) to attack a Defended Tile.
  • Discarding a Faithful for its triggered ability (some, like Captain or Hoplite, grant a Combat Bonus this way) also counts as playing it.

Everything you play during your turn sits in a temporary Discard Pile until your Reinforce Step, when it's collected and reassigned. Faithful that Defended during a Raid return straight to your Temple at the end of that Raid.

The Faithful Deck

The shared 60-card Faithful Deck (separate from the Guard/Acolyte supply used at setup) costs between 2 and 5 gold per card to acquire, and breaks down into three tiers:

  • Basic (2 types, 9 copies each in the deck) — no Fate alignment.
  • Fate-Aligned (12 types, 3 copies each) — aligned to one of the four Fates, but you may own any of them regardless of which Fate Relics are in your Temple.
  • Unique (6 types, 1 copy each) — 5 gold, more powerful than the rest.

Devotees are a special Basic Faithful: the first one you play in a turn collects just 1 gold, but each additional Devotee you play that same turn collects one more than the last (1, then 2, then 3, and so on). Devotees also combo with each Fate's Shrine Relic for extra effects.

Relics

Relics are the powerful tools and ancient artifacts of the world of Foretold. One is revealed into the Marketplace every turn from the 40-card Relic Deck, and purchased Relics sit face-up beside your Tiles.

Basic vs. Fate Relics

Basic Relics (8 types, 24 in the deck, gray banner) have no Fate alignment — own as many as you like, with no restriction.

Fate Relics (16 in the deck — a Crown, Shield, Shrine, and Sword for each of the four Fates) each require an open Altar to house. You may only have one Fate's Relics in your Temple at a time, but Fate Relics unlock two things: they let you play more powerful Fate Cards of the same alignment (see Relic Cost), and collecting all four of one Fate wins you the game outright.

Alternate Win Condition Collect all four Relics of one Fate — say, the Chaos Shrine, Shield, Sword, and Crown, each housed on its own Altar — and you win at the start of your next turn.

Relics of the Fates +Fatesworn

A Second Alternate Win Condition

The Fatesworn expansion adds four more Relics — the Crucible, Ring, Scepter, and Vestments of the Fates. All four are Basic Relics — no Altar required.

If you start your turn holding all four Relics of the Fates, you win the game immediately — there's no Altar requirement, and it stacks with the base game's own alternate win condition above.

They come with real risk, though: if you're ever Smited while holding any Relics of the Fates, you lose control of all of them at once, and your Smiter acquires them — triggering each Relic's normal "on acquire" ability for its new owner. Holding the full set makes you a target.

Of the four, only the Crucible of the Fates carries a Fate affiliation of its own — it counts as a Relic of every Fate type, letting you play any Fate Card as though its Relic Cost were reduced to 1, like a permanent Scroll. The Ring, Scepter, and Vestments have no Fate affiliation.

Using Relics

You can activate a Relic's ability as an Action any time it's legally playable. Some Relics have a cost baked into their ability (a Shrine, for example, requires sacrificing a Devotee from your Discard Pile), and you can use them any time that cost can be paid — during your Marketplace Step, or even mid-Raid if a Devotee was just defeated. Others depend on game state (a Runestone, for instance, needs a die roll already on the table to trigger off of).

Many Basic Relics are sacrificed on use — meaning after their ability resolves, they go to the bottom of the Relic Deck.

Changing Fate Relic Alignments

You may only house one Fate's Relics in your Temple at a time, but you can switch. If you currently hold a Wisdom Relic and want a Chaos Relic instead, you must first return every Wisdom Relic you own to the Marketplace (no refund) before acquiring the Chaos Relic. When you return a Fate Relic this way, place it on any empty Relic Row spot, or cover another Relic if the row is full.

The Fates & Fate Cards

Before there were gods, there were the Fates — ancient influences guiding all forces, seen and unseen. Each of the four Fate Decks plays very differently:

  • Chaos drives aggression, impulsiveness, and war — powerful in a Raid, and able to smash opposing Relics or destroy opposing Faithful outright.
  • Grace unites and protects — emboldening combat, shielding your Raiding Party, and even converting opposing Faithful to your side.
  • Prosperity trades in wealth and ambition — its cards accumulate gold and, at the high end, can accomplish almost anything for the right price.
  • Wisdom rewards knowledge — it manipulates both combat and the Marketplace, and its most flexible cards can even reach into other Fate Decks.

Each Fate Deck has 30 cards: 15 with no Relic Cost, 9 with a Relic Cost of 1, 5 with a Relic Cost of 2, and 1 with a Relic Cost of 3.

Relic Cost

A Fate Card's Relic Cost — shown by the Fate symbols in its top-right corner — is the number of matching Fate Relics you must have in your Temple to play it. Own 2 Wisdom Relics, for example, and you can play any Wisdom Fate Card with a Relic Cost of 2 or less. Some Relics or Fate Cards reduce a card's Relic Cost by 1 or more, letting you play above your current Relic count; a few cards waive the Relic Cost entirely.

Playing, Responding, and Resolving

  • There's no limit on how many Fate Cards you can hold or play in a turn.
  • Most Fate Cards can be played any time; some specify a restriction like "play this only on your turn," which must be respected unless another card overrides it.
  • Responding: whenever a player takes an Action, every opponent may interrupt with a Response (usually a Fate Card) before that Action takes effect.
  • Resolving: an Action resolves once nobody wishes to respond to it. When multiple Actions are stacked up waiting to resolve, the last one played resolves first — "last in, first out."
  • Once resolved, a Fate Card goes to a shared, face-up discard pile next to the Fate Decks and can't be reused. If a Fate Deck ever empties, it simply can't be drawn from again.

Actions & Responding

Any time you use an ability on a card or Tile you own, it's an Action — and every opponent gets a chance to respond before it resolves. Actions include:

  • Playing a Faithful.
  • Rolling dice, for combat or Smiting (opponents may respond before the roll, or after all dice are assigned).
  • Playing a Fate Card.
  • Flipping a Tile (Trap or otherwise — some Tiles trigger an effect on flip that can also be responded to).
  • Using a Relic's ability (which may require a sacrifice).

Buying is not an Action — nobody can respond to, or interrupt, a purchase from the Marketplace.

Raiding & Combat

Overview

Once you're ready, use your Raiding Party to attack one opponent's Temple per turn. Your Raiding Party Marker starts at their Entrance and advances Tile by Tile toward their Heart. Every Tile with a Station triggers a battle — one or more Defending Faithful (one per Station) against however many Raiding Faithful you choose to dispatch. Win, and the Tile is conquered for the rest of the Raid, letting your party move freely onto the next adjacent Tile. Conquer the Heart Tile, and you get to Smite your opponent.

The Combat Roll

When Faithful fight, roll one combat die per Faithful played (some cards call for extra dice — Warrior and Demigod, for example). Roll everything at once, then assign one result per Faithful — you choose the assignment, so assign strategically (a low roll to a Faithful whose Combat Bonus benefits most from it, for instance).

Combat Bonuses — printed on many Faithful and Tiles — add straight to that side's total. Multiple bonuses stack. A player's full Combat Roll is the sum of every assigned die plus every active Combat Bonus.

Resolving a Combat Roll: the higher total wins; a tie always goes to the Defender. If a Faithful (or the Tile itself) is removed from combat — discarded or sacrificed — before the roll is final, its Combat Bonus and die result come off the total immediately, and the total is recalculated. No Combat Roll is final until every player at the table — even those not directly in the fight — agrees no one has any more responses to play.

Raiding, Step by Step

  1. Announce your target. Pick up your Raiding Party's Faithful and place your Raiding Party Marker on your chosen opponent's Entrance Tile.
  2. Defender chooses whether to Defend. The first time your Marker lands on a given Tile this Raid, its owner may Defend with one Faithful per Station on that Tile. A Tile with no Stations can't be Defended (or conquered) at all — the Raiding Party simply passes through. If the Defender chooses not to Defend a Tile that does have Stations, it's conquered automatically.
  3. Roll for the Defense. The Defender rolls one combat die per Defending Faithful, assigns them, and totals the Defending Combat Roll (dice + Combat Bonuses).
  4. Dispatch your Raiders. Choose any number of Faithful from your Raiding Party to dispatch into this fight. You can send as many as you like — but remember, only one gets to return to the Raiding Party afterward (step 8), so commit thoughtfully.
  5. Roll for the Raid. Roll one combat die per dispatched Faithful, assign them, and total your Raiding Combat Roll.
  6. Finalize. Fate Cards and other triggered abilities can still be played once dice are assigned. Nothing is final until every player agrees no more responses are coming.
  7. Conquer, or retreat. If your Raiding total doesn't beat the Defender's (remember, ties favor the Defender), your Raiding Party must retreat, ending the Raid. If your total is higher, the Tile is conquered: the Defending Faithful are set aside as "defeated" until end of Raid, and your Raiding Party may advance.
  8. Recall one Faithful. On a successful conquest, return exactly one of your dispatched Faithful to your Raiding Party. Every other Faithful you dispatched into that fight is discarded (temporarily — everyone gets collected again at Reinforce).
  9. Advance. Move to any adjacent Tile. If it has Stations and hasn't already been conquered, repeat from step 2. Keep going until you either retreat or reach the Heart.

If a Raid ends in retreat, your dispatched Raiding Faithful simply go to your discard pile — at your next Reinforce Step, you collect all of your Faithful (win or lose) and reassign them to Temple or Raiding Party as normal. There's no separate penalty beyond the failed attack itself.

Worked Example Say your Raiding Party dispatches a Guard (+2 Combat Bonus) and a second Guard (+2) against a Tile defended by one Acolyte (no bonus). You roll 2 dice for your Raiders — say a 3 and a 5 — for a total of 3 + 5 + 2 + 2 = 12. The Defender rolls 1 die for their Acolyte — say a 4 — for a total of 4 + 0 = 4. Your 12 beats their 4, so the Tile is conquered; you recall one Guard to your Raiding Party, and the other is discarded until Reinforce.

Smiting

The moment your Raiding Party conquers the Heart Tile, recall one Faithful as usual, then Smite the Defender:

  1. Every Faithful still in your Raiding Party strikes the opposing deity directly, dealing 1 damage each.
  2. Roll the Smiting Die (faces: 3, 4, 4, 5, 5, 6) for that much additional damage.

Certain cards and Tiles can add even more damage to a Smite Roll. Cards that trigger specifically "on Smite" (Vandal, or any of the four Crown Fate Relics) resolve after the damage lands.

End of Raid

A Raid ends the moment a player either retreats or Smites their opponent. The Defender's Faithful — played or defeated — all return to their Temple. The Raiding Player then moves on to their Reinforce Step.

Life Points, Healing, Elimination & Victory

Every player starts with 20 Life Points — the maximum. Cards that "Heal" restore lost Life Points but can never push you above 20; if you're already at full health, a Heal effect simply does nothing (you aren't considered "Healed" unless it actually restores something). Damage can also be "Prevented" by some cards — in that case no Life Points are ever lost, and it isn't Healing either.

Elimination: when a player's Life Points hit zero, they're out of the game. Their Relics and any non-starting Faithful are shuffled back into the shared Marketplace decks — but their Temple Tiles stay exactly as placed on the table and are not returned to any deck.

  • If a player is eliminated on their own turn, play continues with the person to their left.
  • If a player is eliminated mid-Action (before that Action resolves), the Action simply has no effect.

Victory is achieved the moment either win condition is met: you're the last player standing, or you collect all four Relics of a single Fate (confirmed at the start of your next turn). Playing with Fatesworn adds a third path: holding all four Relics of the Fates at the start of your turn. +Fatesworn

Rules Variants

Foretold's open design invites house rules and variants — some are small tweaks, others add a whole new twist. The current library of community and designer variants lives at foretold-game.com; agree on any variant as a table before your game begins, and feel free to submit your own.

Glossary

Every term used consistently throughout this page, alphabetically.

A-Side
the face-up starting side of a Tile.
Acquire
gaining control of a card or Tile, whether bought or taken by an effect.
Action
anything a player does that opponents may respond to: playing a Faithful, rolling dice, sacrificing a card, using a Relic, and so on. Buying is the one exception — it is not an Action.
Alignment
one of the four Fates (Wisdom, Chaos, Grace, Prosperity). Applies to Fate Relics (only one alignment allowed in your Temple at a time) — Faithful are not restricted this way.
Altar
the Tile icon required to house a Fate Relic.
B-Side
the hidden side of a Tile, revealed once it's flipped.
Basic Relic
a Relic with no Fate alignment; needs no Altar.
Basic Faithful
Devotee and the deck's other non-aligned type, plus Acolyte and Guard from the starting supply; no Fate alignment.
Combat Bonus
a number added to a Combat Roll, from a Faithful or Tile.
Combat Roll
the total of assigned dice plus all active Combat Bonuses for one side of a fight.
Conquer
winning a Tile's combat, letting the Raiding Party move past it freely for the rest of that Raid.
Damage
the loss of Life Points, from a Fate Card, Relic, or a Smite.
Defeated
a Defending Faithful whose Tile was conquered; returns to its Temple at end of Raid.
Discard Pile
where played, acquired, or defeated Faithful sit until the next Reinforce Step.
Dispatch
sending Faithful from your Raiding Party into a fight.
Doorway
the connectors on a Tile's edges that let it link to another Tile.
Fate Card
a one-time-effect card from one of the four Fate Decks.
Fatesworn Symbol +Fatesworn
appears on some Fatesworn Faithful, Fate Cards, and the Crucible of the Fates. Counts as every Fate Alignment at once — for meeting a Relic Cost or triggering alignment-based abilities.
Flip Cost
the gold cost to flip a Tile from its A-side to its B-side.
Gold
the shared in-game currency.
Heart
the Starting Tile that holds your Life Points; the target of every Raid.
Marketplace Decree +Fatesworn
a special effect that applies to the whole game for as long as a Faithful bearing it sits in the Marketplace. It can't be covered up, and keeps applying until removed by a Fate Card or ability, or until a player acquires that Faithful.
Raiding Party
the group of Faithful set aside to attack opposing Temples.
Recall
returning one dispatched Faithful to your Raiding Party after conquering a Tile.
Reinforce
the turn's final step: collecting and reassigning all your Faithful.
Relic Cost
the number of matching Fate Relics required to play a given Fate Card.
Relics of the Fates +Fatesworn
the Crucible, Ring, Scepter, and Vestments — four Basic Relics with no Altar requirement (only the Crucible carries a Fate affiliation). Holding all four at the start of your turn wins the game. See Relics.
Resolve
an Action takes effect once no one has a Response left to play.
Response
an interrupting Action, played before the original Action resolves.
Retreat
a failed Raid, ending it immediately.
Sacrifice
placing a card on the bottom of its home deck as a cost or effect.
Smite
the damage dealt when a Raiding Party conquers the Heart Tile.
Station
the Tile icon that both defines a defensible position and sets your Temple's Faithful capacity.
Temple
your Tiles, and the Faithful and Relics housed within them.

Card Index

The full, official component list — every card in the box, by name and quantity.

Faithful (80 total)

Avatar ×1Berserker ×3Captain ×3Crusader ×3Demigod ×1Devotee ×9Guard ×10Acolyte ×6High Priest ×4Hoplite ×9Incarnate ×1Mason ×3Merchant ×3Oracle ×1Priest ×3Recruiter ×3Retainer ×3Scholar ×3Thief ×3Trickster ×1Vandal ×3Warlock ×1Warrior ×3

Relics — Basic (24 total)

Fountain ×2Idol ×2Offering ×3Runestones ×4Scrolls ×3Spear ×4Urn ×3Weather Vane ×3

Relics — Fate-Aligned (16 total)

Chaos Crown ×1Chaos Shield ×1Chaos Shrine ×1Chaos Sword ×1Grace Crown ×1Grace Shield ×1Grace Shrine ×1Grace Sword ×1Prosperity Crown ×1Prosperity Shield ×1Prosperity Shrine ×1Prosperity Sword ×1Wisdom Crown ×1Wisdom Shield ×1Wisdom Shrine ×1Wisdom Sword ×1

Starting Tiles (20 total)

Entrance ×4Heart ×4Pathway ×4Sanctum ×4Treasury ×4

Tile Deck (25 total)

Ambush Trap ×2Annex ×1Antis ×1Archives ×2Armory ×1Baths ×1Ceiling Trap ×2Cella ×1Coffers ×1Colonnade ×4Hall ×2Oraculum ×2Pit Trap ×2Prison ×1Spear Trap ×2

Chaos Deck (30 total)

Agitate ×1Arbitrary Execution ×1Assault ×1Begrudge ×1Boost ×3Cruel Dispatch ×1Degrade ×3Devotion to Chaos ×1Dueling Circle ×1Frenzy ×1Mortify ×1Provoke ×3Pulverize ×1Recast ×3Reconstruct ×1Scorn Intellect ×1Strike ×3Superbolt ×1Violent Outburst ×1Wreak Havoc ×1

Grace Deck (30 total)

Admonish ×1Ancient Cleansing ×1Attunement ×1Bolster ×1Closure ×1Console ×1Convalesce ×1Cure ×3Devotion to Grace ×1Empower ×1Enliven ×3Hallowed Ground ×1Healing Circle ×1Holy Chant ×1Immediate Evacuation ×1Peaceful Conversion ×1Reinforce ×3Revive ×3Shield ×1Simplify ×3

Prosperity Deck (30 total)

Activate ×3Bribe ×1Cache ×1Devotion to Prosperity ×1Enlist ×3Exploration ×1Financial Accord ×1Hostile Takeover ×1Profiteering Circle ×1Restitute ×3Ruthless Taxation ×1Subsidize Wealth ×1Surplus ×3Survey ×1Tarnish ×1Tithe ×1Triumph ×1Turnover ×1Upgrade ×3Vindictive Grant ×1

Wisdom Deck (30 total)

Awaken ×3Broaden ×1Cunning Exchange ×1Devotion to Wisdom ×1Empower ×1Entice ×1Exercise Control ×1Expand Horizons ×1Impose Intellect ×1Innervate ×1Inspect ×3Logic Circle ×1Maneuver ×3Psychic Seizure ×1Sharpen ×3Shroud ×1Silence ×3Stifle ×1Swap ×1Transcend ×1

Credits

Game Design: Jay Semerad
Graphic Design: Neal Rasmussen
Faithful and Relic Art: Garrett Post
Rules Document: Jay Semerad
Rules Document Editing: Orin Kennedy
Card Rules Text & Editing: Rob McKenzie, Jay Semerad
Additional Game Design: Morgan Burns

May the Fates reward your devotion, and aid you in your quest for immortality.